> ## Documentation Index
> Fetch the complete documentation index at: https://docs.auracalls.ai/llms.txt
> Use this file to discover all available pages before exploring further.
# Google App Setup
> This document provides instructions on setting up a Google application so users can login/register via Google on your site.
## Enabling API & App Registration
To allow users to log in to your site with their Google account, you need to create a Google Cloud project and configure the OAuth. Follow steps below to create a configure your Google Cloud project.
## 1. Sing in to continue to Google Cloud Platform
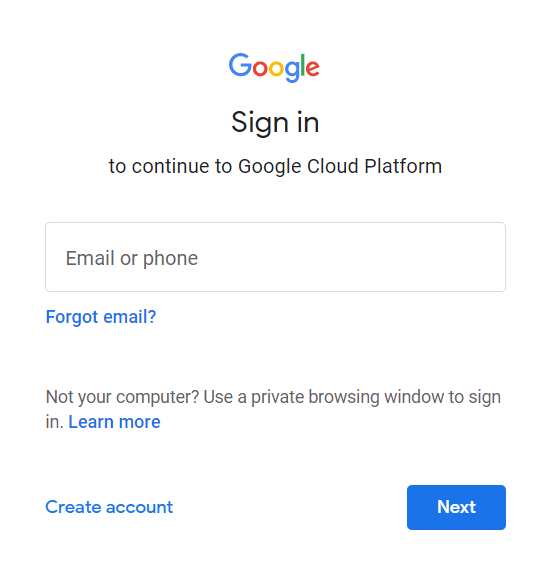
Go to [https://console.cloud.google.com/](https://console.cloud.google.com/) and sing in to enter the Google Cloud console.
 ## 2. Create a project
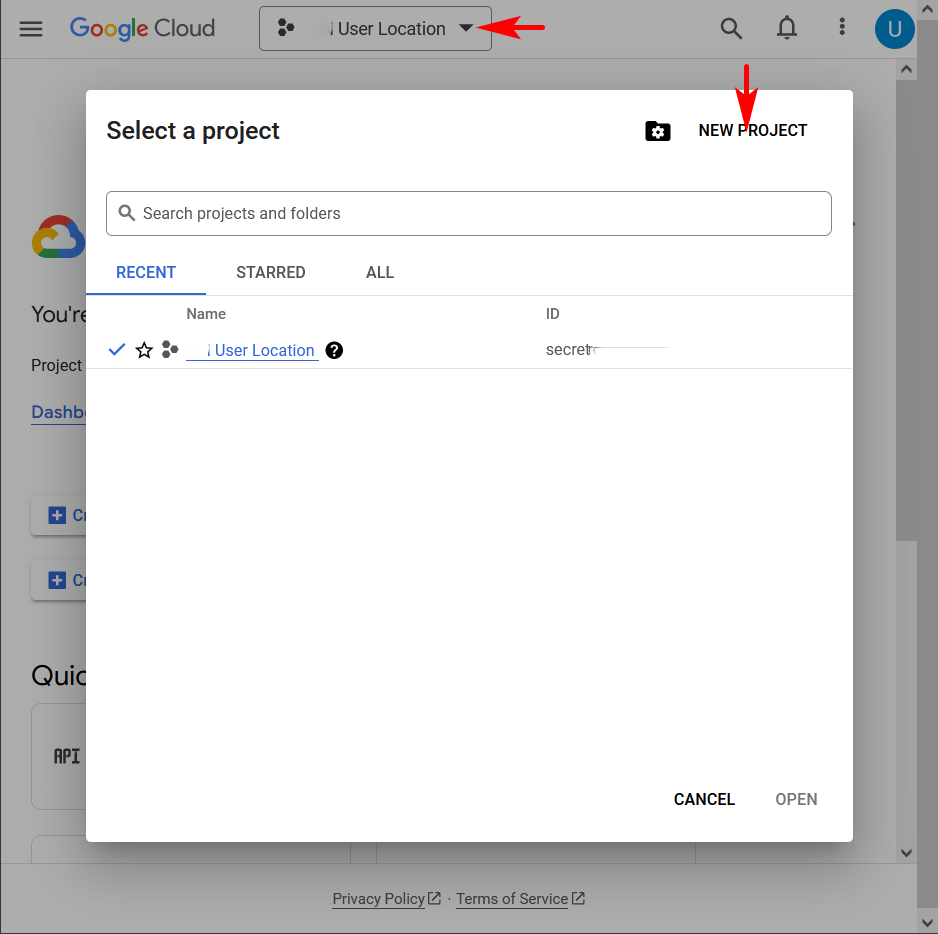
Click the project button in the top menu and you'll see the **Select a project** pop-up. Click the **NEW PROJECT** button create a project.
## 2. Create a project
Click the project button in the top menu and you'll see the **Select a project** pop-up. Click the **NEW PROJECT** button create a project.
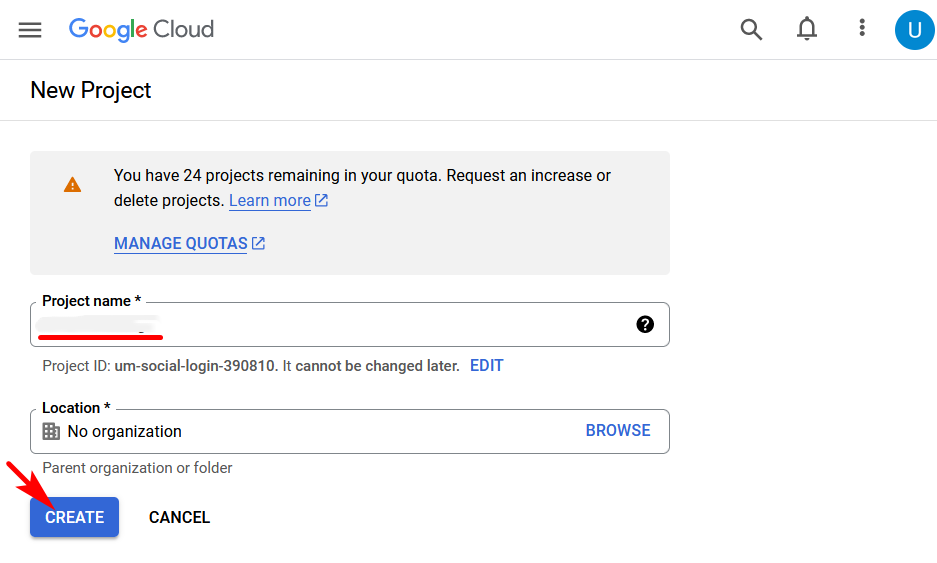
 Enter the **Project name** and click the **CREATE** button.
 ## 3. Start to configure the OAuth consent screen
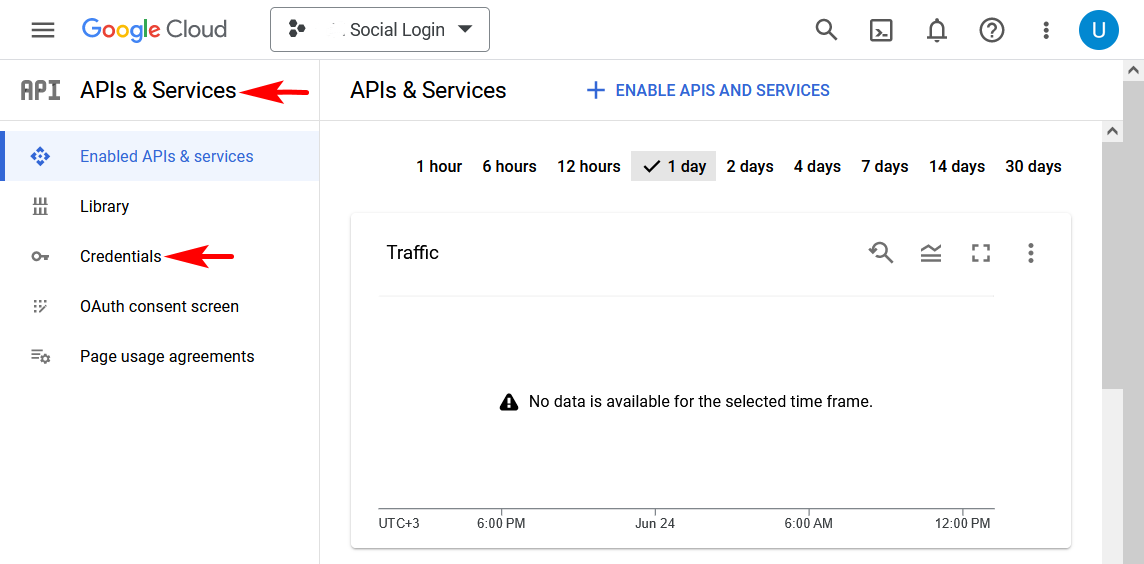
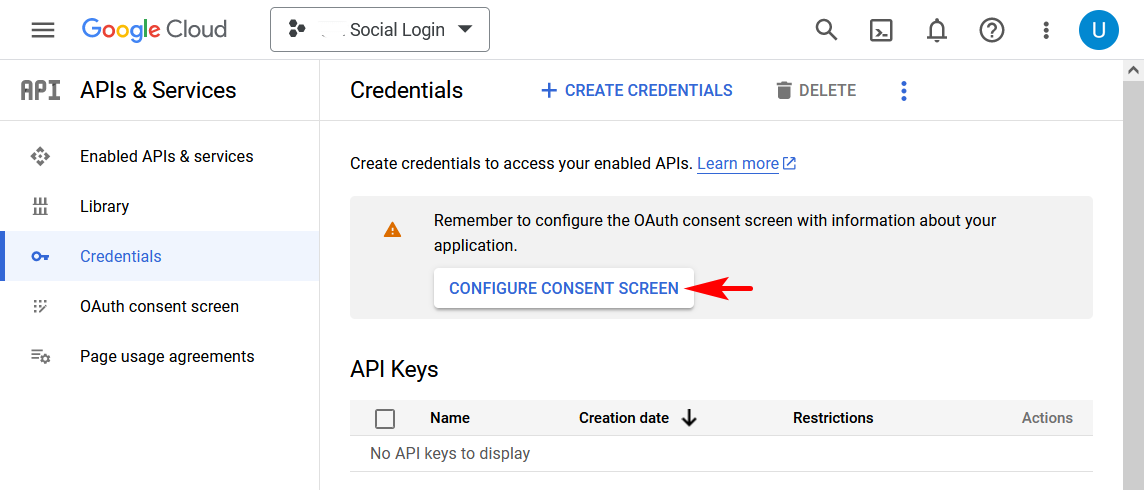
Once a project is created, go to **APIs & Services**. Select **Credentials** from the left-side menu then click the **CONFIGURE CONSENT SCREEN** button.
## 3. Start to configure the OAuth consent screen
Once a project is created, go to **APIs & Services**. Select **Credentials** from the left-side menu then click the **CONFIGURE CONSENT SCREEN** button.
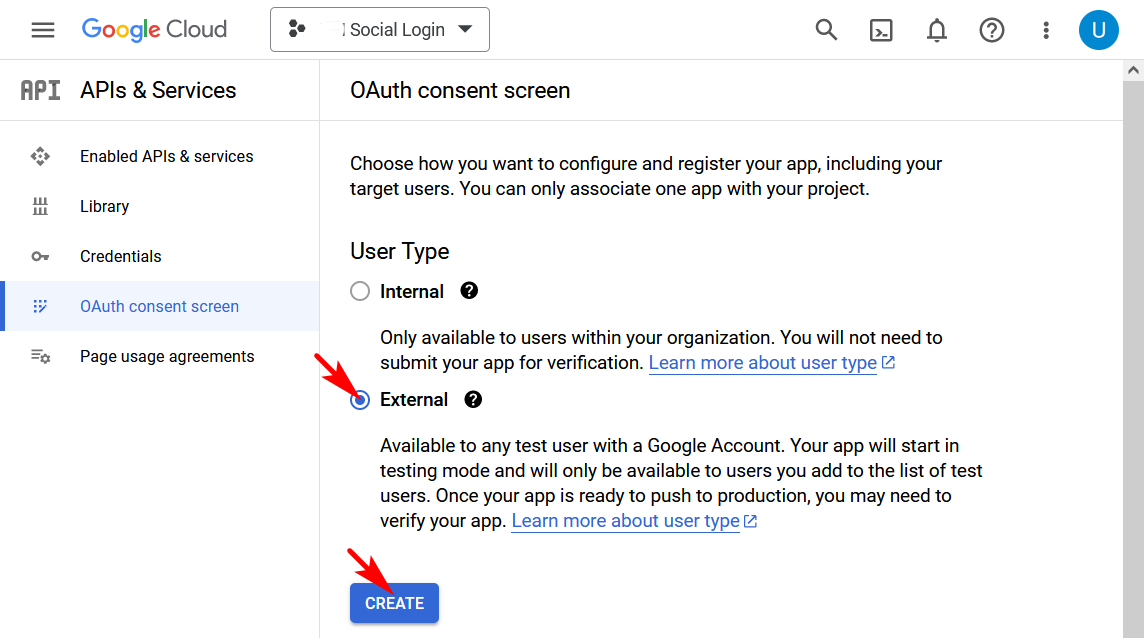
 Choose the External in the User Type options, then click the CREATE button.
 ## 4. Edit app registration
### 4.1 OAuth consent screen
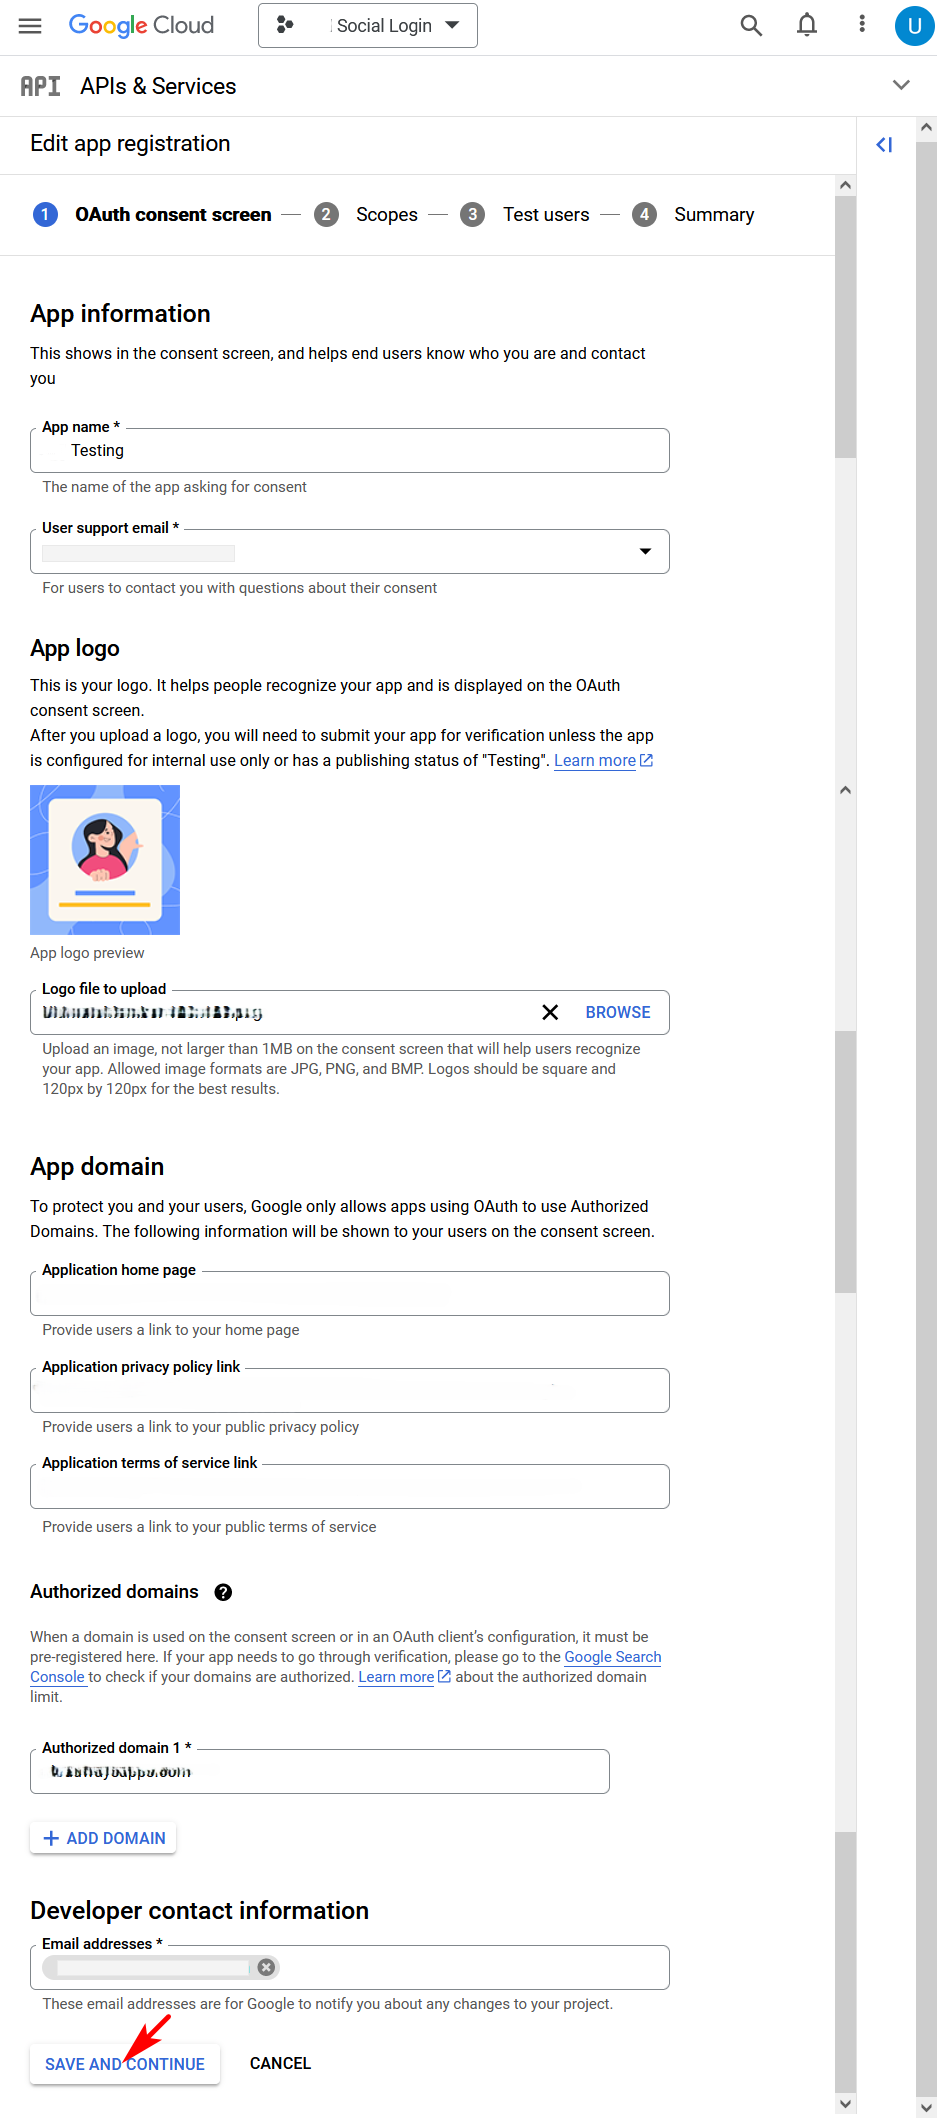
Enter the **App name**, **User support email**, upload **App logo**.
Enter the **Application home page**, **Application privacy policy link**, **Application terms and service link**.
Enter your website **domain**.
Enter your contact **Email addresses**.
Continue to the next step by clicking the **SAVE AND CONTINUE** button.
## 4. Edit app registration
### 4.1 OAuth consent screen
Enter the **App name**, **User support email**, upload **App logo**.
Enter the **Application home page**, **Application privacy policy link**, **Application terms and service link**.
Enter your website **domain**.
Enter your contact **Email addresses**.
Continue to the next step by clicking the **SAVE AND CONTINUE** button.
 ### 4.2. Scopes
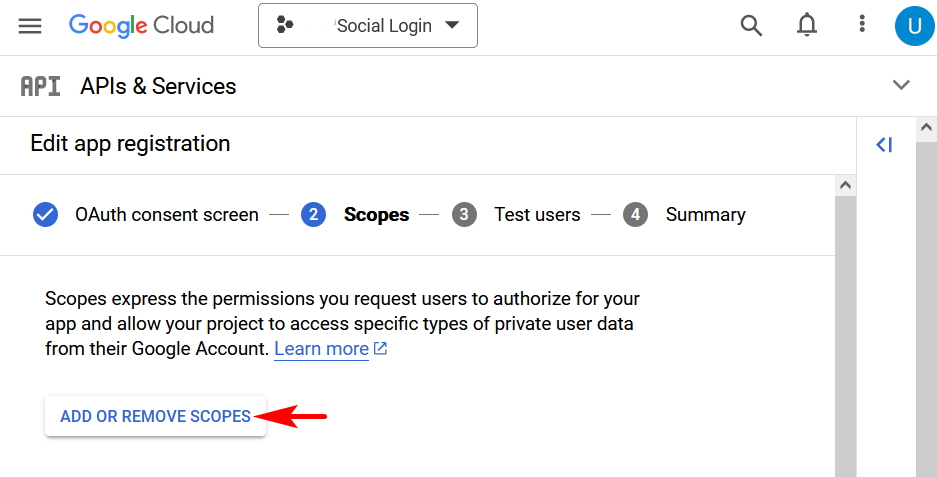
You'll be on the step **Scopes**. Click the **ADD OR REMOVE SCOPES** button to select the scopes.
### 4.2. Scopes
You'll be on the step **Scopes**. Click the **ADD OR REMOVE SCOPES** button to select the scopes.
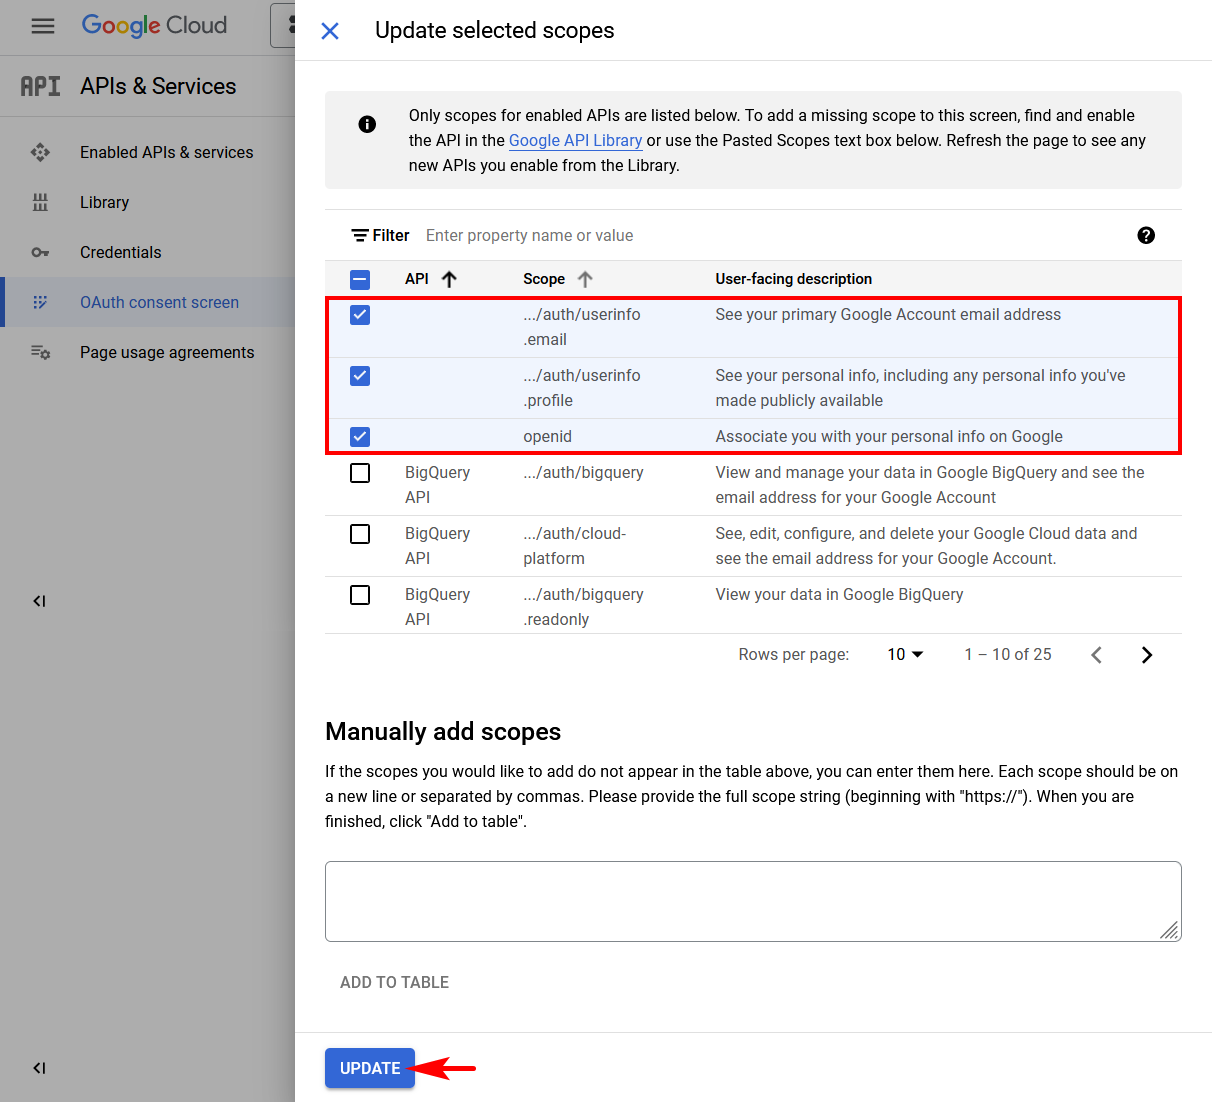
 Select three required API Scopes:
* **.../auth/userinfo.email**
* **.../auth/userinfo.profile**
* **openid**
Once selected click on the **UPDATE** button.
Select three required API Scopes:
* **.../auth/userinfo.email**
* **.../auth/userinfo.profile**
* **openid**
Once selected click on the **UPDATE** button.
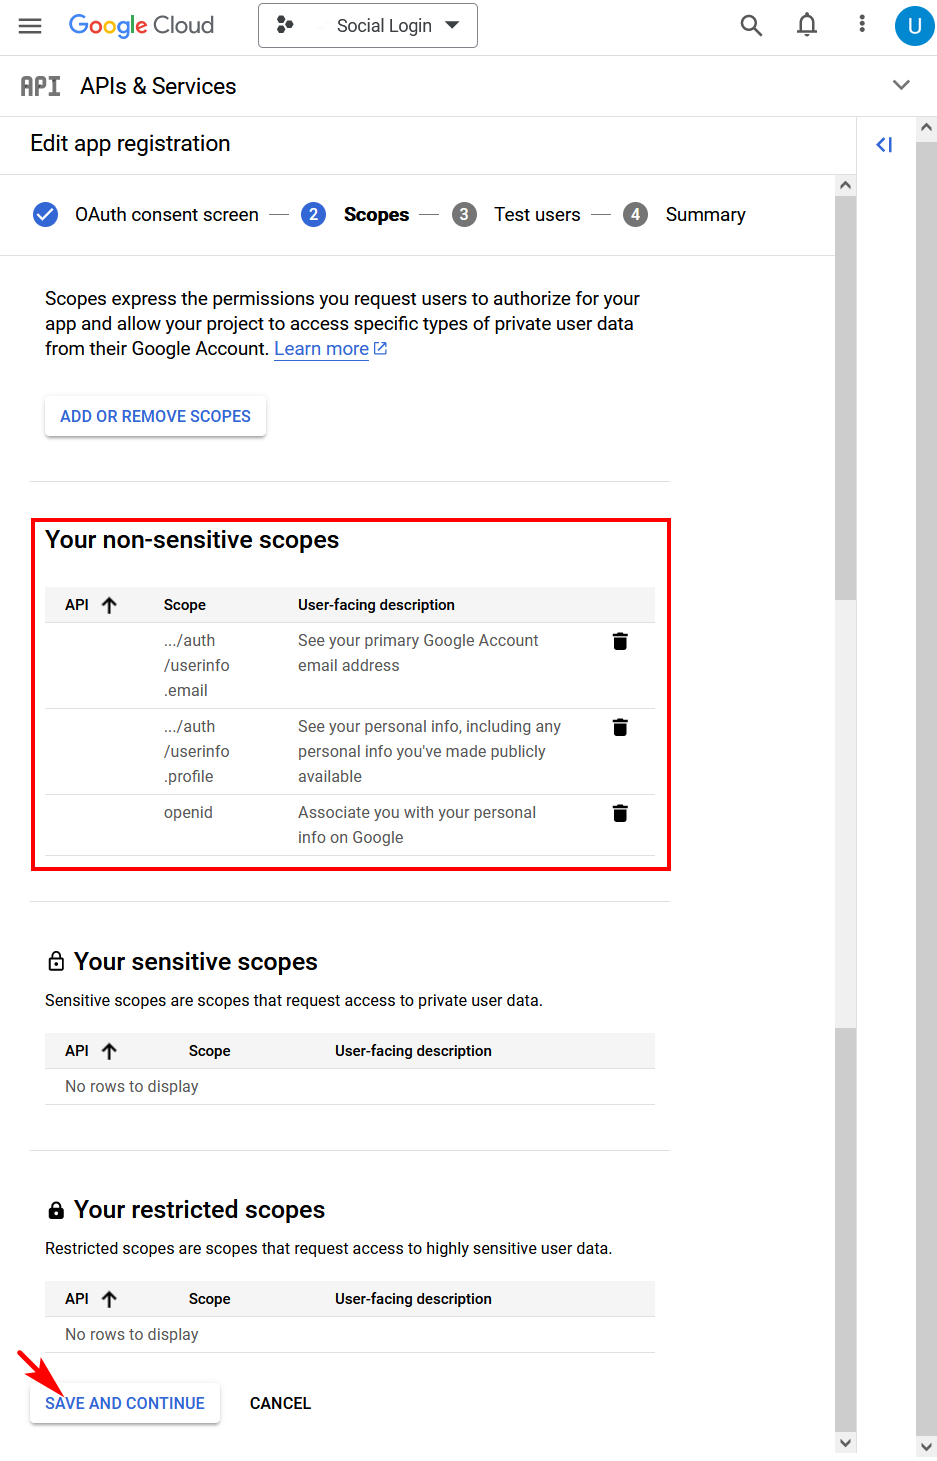
 The selected scopes will now appear on the **Your non-sensitive scopes** section.
Continue to the next step by clicking on the **SAVE AND CONTINUE** button.
The selected scopes will now appear on the **Your non-sensitive scopes** section.
Continue to the next step by clicking on the **SAVE AND CONTINUE** button.
 ### 4.3 Test users
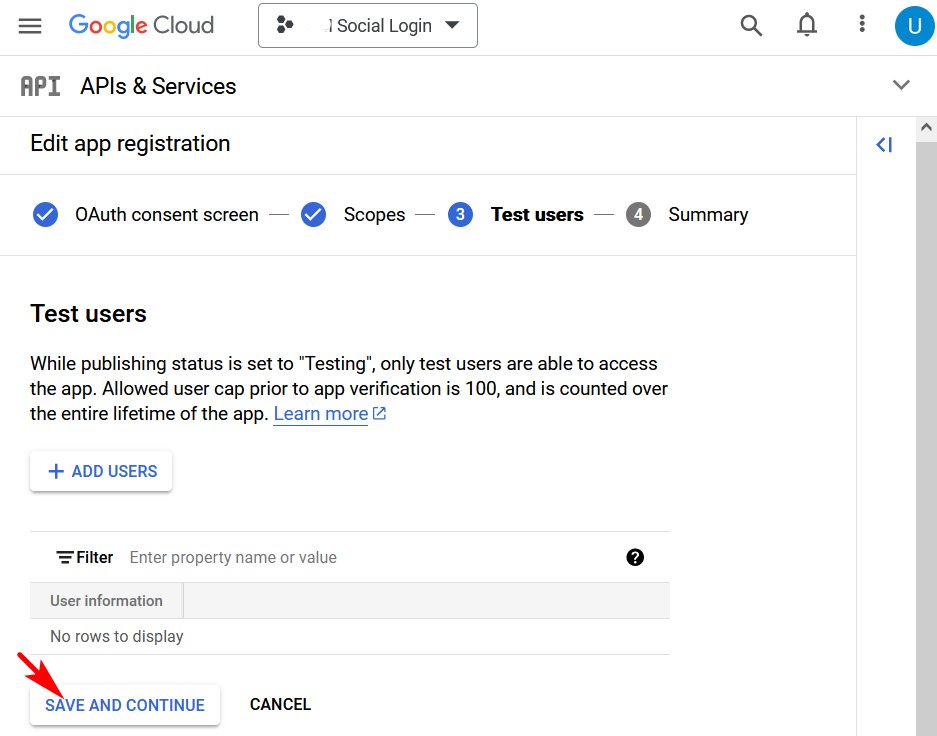
You'll be on the step **Test users**. On this step you can add Test users to test the social login, or just continue to the next step by clicking the **SAVE AND CONTINUE** button.
### 4.3 Test users
You'll be on the step **Test users**. On this step you can add Test users to test the social login, or just continue to the next step by clicking the **SAVE AND CONTINUE** button.
 ### 4.4 Summary
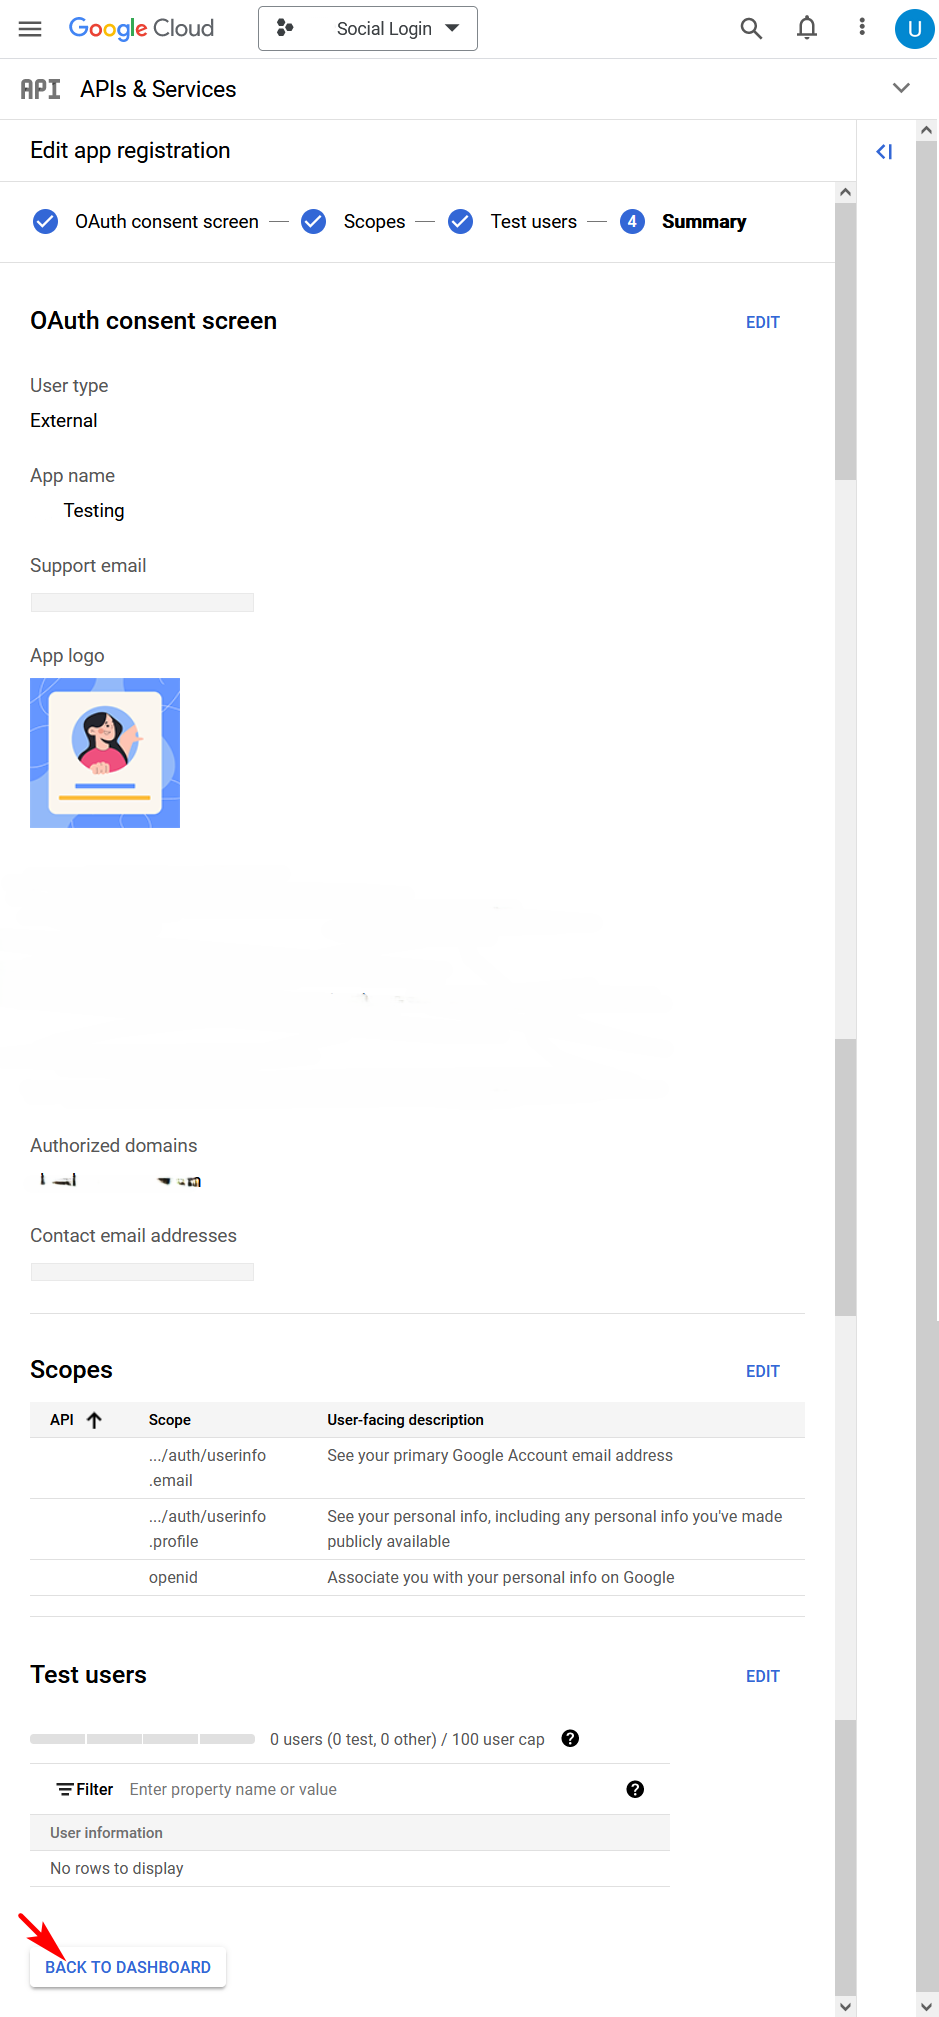
You'll be on the step **Summary** that shows you the outline of your app registration. Click the **BACK TO DASHBOARD** button.
### 4.4 Summary
You'll be on the step **Summary** that shows you the outline of your app registration. Click the **BACK TO DASHBOARD** button.
 ## 5. Create credentials
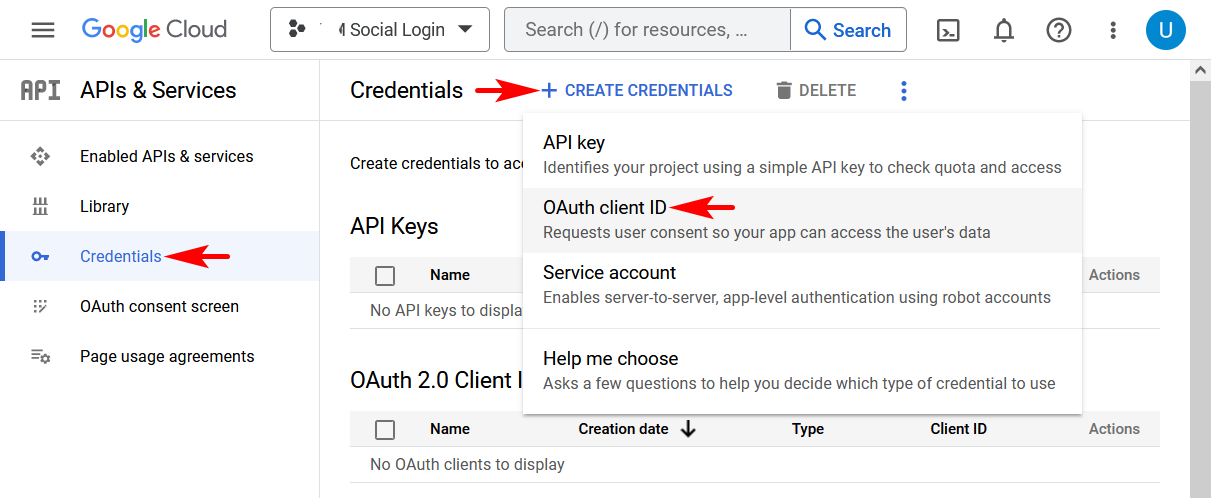
Select **Credentials** from the left-side menu. Click the **CREATE CREDENTIALS** button and select the **OAuth client ID** item.
## 5. Create credentials
Select **Credentials** from the left-side menu. Click the **CREATE CREDENTIALS** button and select the **OAuth client ID** item.
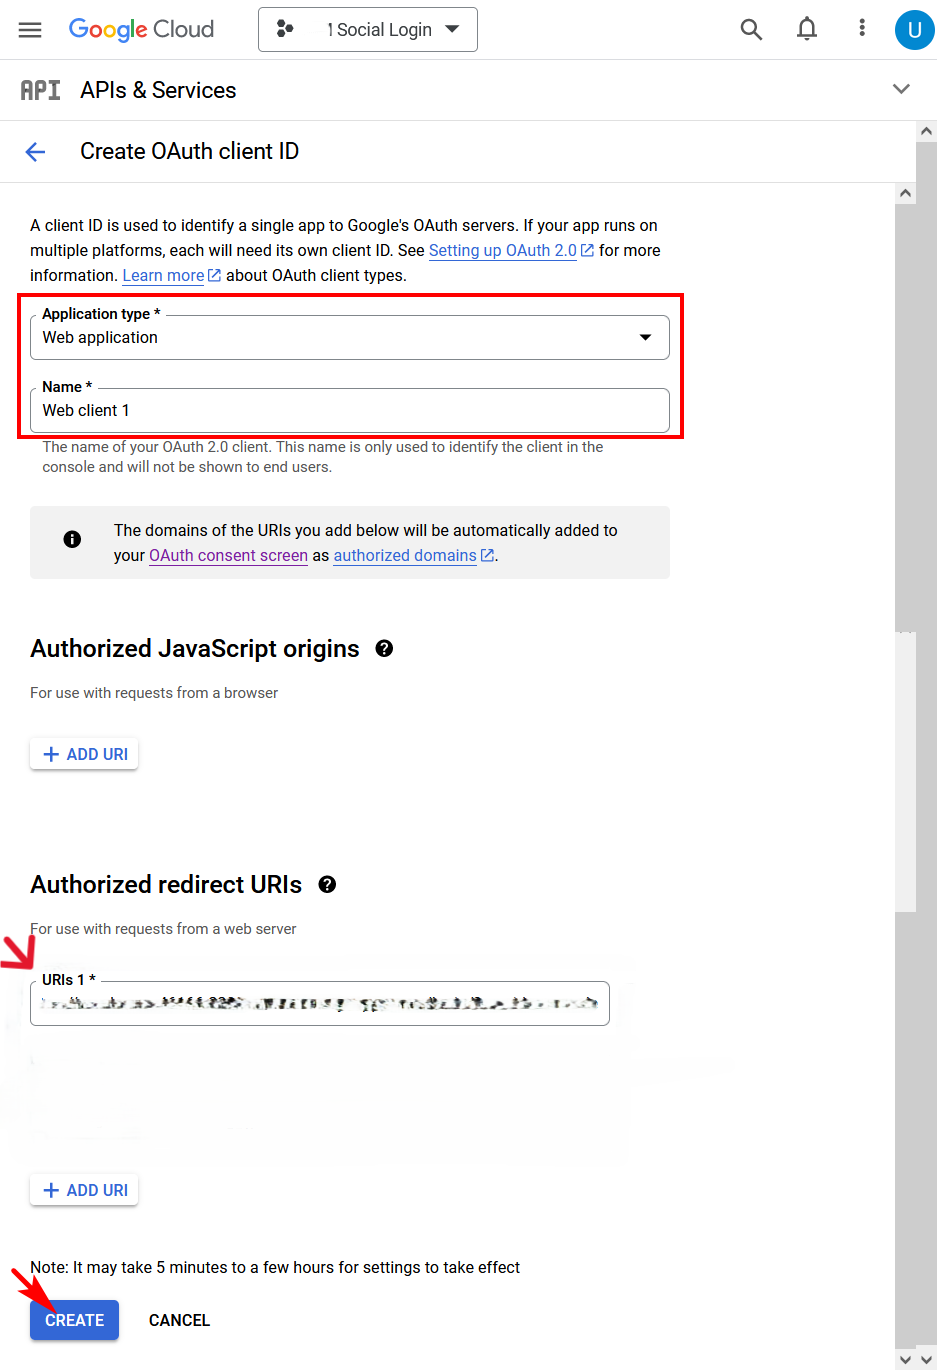
 Once clicked, it'll take you to the **Create OAuth client ID** page.
Select the **Web application** option in the **Application type**. Enter a name of your OAuth 2.0 client in the Name field.
Enter allowed redirect URLs in the **Authorized redirect URIs** section.
See example:
* **[https://sss.com/login/google/callback](https://sss.com/login/google/callback)**
By default, URLs have the "/" symbol at the end of the path. Remove "/" before "?" if your site uses URLs without "/" at the end of the path.
Click the **CREATE** button.
Once clicked, it'll take you to the **Create OAuth client ID** page.
Select the **Web application** option in the **Application type**. Enter a name of your OAuth 2.0 client in the Name field.
Enter allowed redirect URLs in the **Authorized redirect URIs** section.
See example:
* **[https://sss.com/login/google/callback](https://sss.com/login/google/callback)**
By default, URLs have the "/" symbol at the end of the path. Remove "/" before "?" if your site uses URLs without "/" at the end of the path.
Click the **CREATE** button.
 ## 6. Enter your keys
Once you click the button, the **OAuth client created** pop-up will appear and you'll see your application keys.
## 6. Enter your keys
Once you click the button, the **OAuth client created** pop-up will appear and you'll see your application keys.
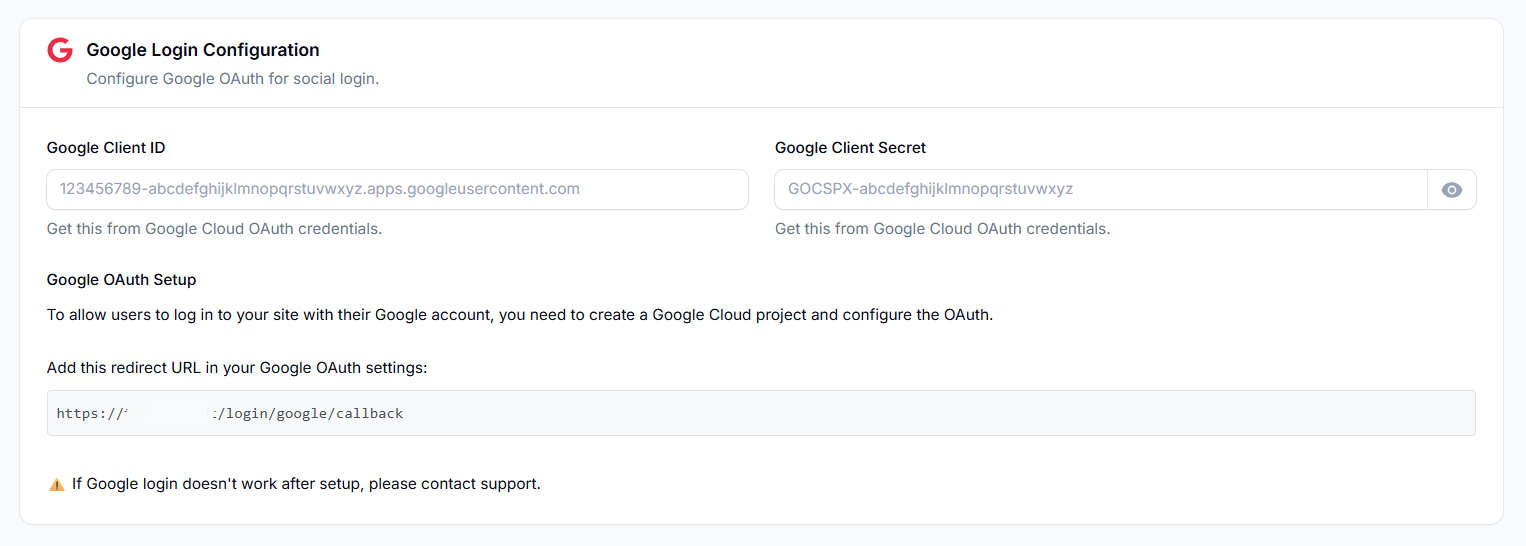
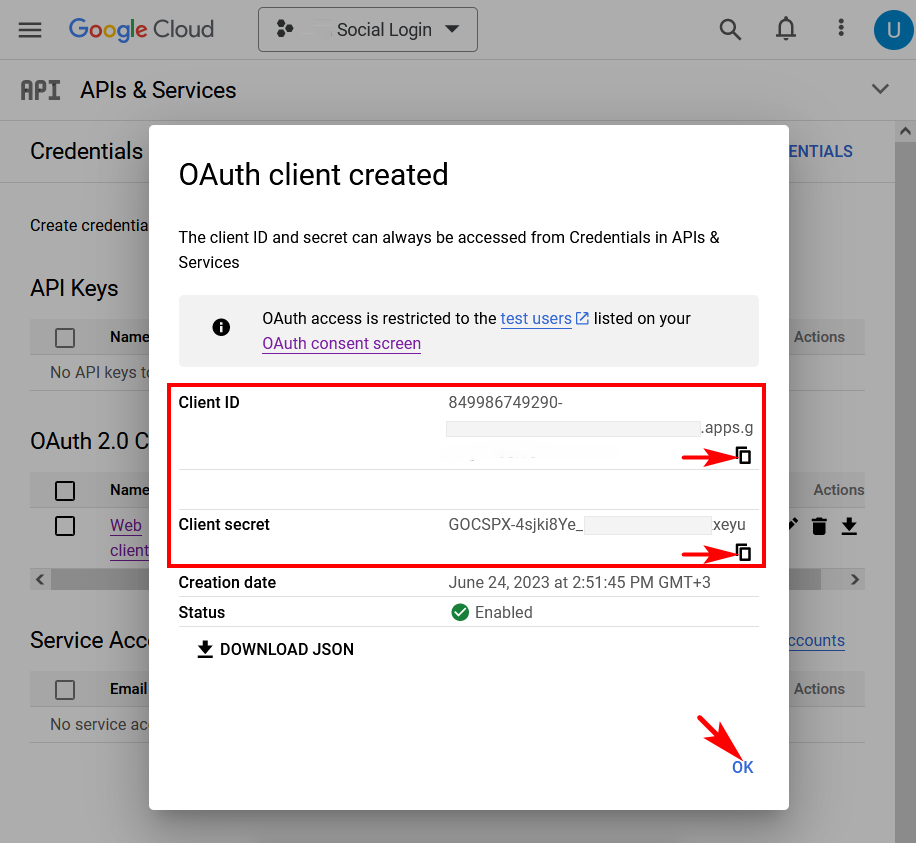 Copy your **Client ID** and **Client Secret** keys and paste them to the **Client ID** and **Client secret** fields under the **Google Login Configuration** on the white-label > Settings > Social Logins.
 ## Test
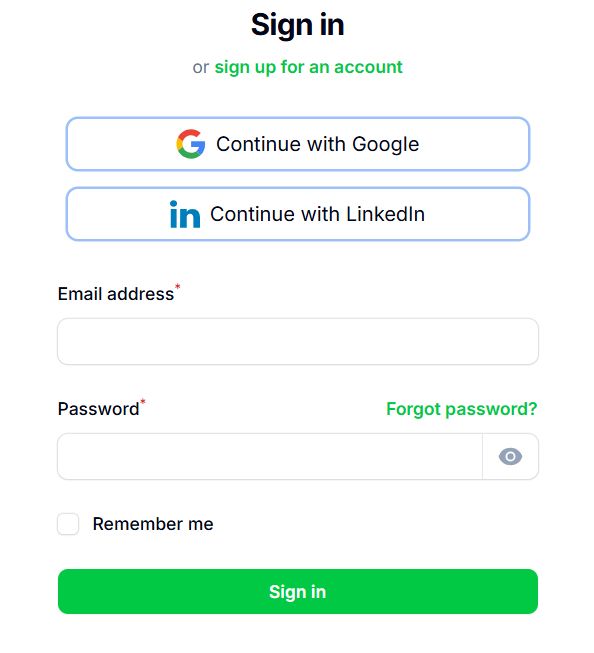
Test the Social Login feature at the Login and Registration pages. If you're encountering issues, please contact our support team for assistance with any step of the setup process.
## Test
Test the Social Login feature at the Login and Registration pages. If you're encountering issues, please contact our support team for assistance with any step of the setup process.
 ***
**Need help?** Contact our support team for assistance with any step of the setup process.
***
**Need help?** Contact our support team for assistance with any step of the setup process.